Home > Electronics > Arduino Compatible SCM & DIY Kits > Smart Robot & Solar Panel
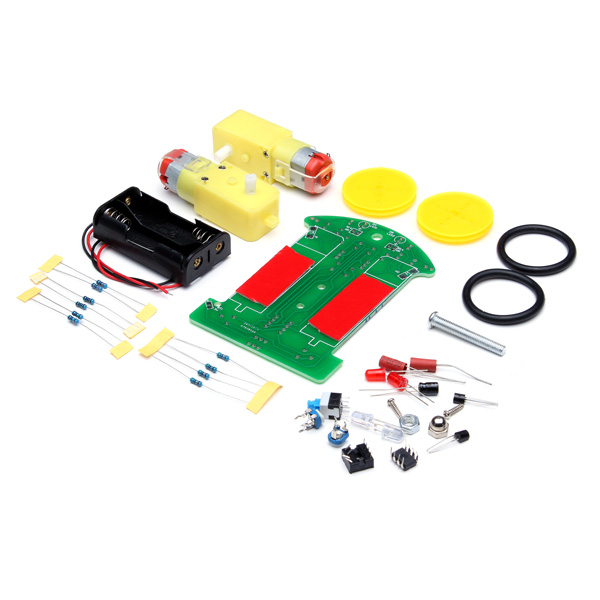
Tracking Robot Car Electronic DIY Kit With Reduction Motor
Tracking Robot Car Electronic DIY Kit With Reduction Motor The assembly steps: Step 1: Welding circuit Electric welding part is simpler, welding sequence according to the principle of component level from low to high, the first welding eight resistance, is important to use multimeter to confirm resistance is correct, D4, D5 R13 R14 can temporarily not welding, integrated circuit chips can temporarily not inserted Step 2: Mechanical assembly The red line is connected to the 3V positive power supply, the yellow line grounding, excess wire can be used for motor wire. Step 3: The installation of a photoelectric circuit Photosensitive resistance and light-emitting diodes (note polarity) is reverse-mounted on the PCB, and the ground distance is about 5 mm, both photosensitive resistance and light-emitting diodes are 5 mm distance. Finally, you can power test. Step 4: Vehicle debugging The right direction is along the universal wheel direction, if you press and hold the left photoresistor, the wheels on the right side of the car should be rotated. Press and hold the right photoresistor, the wheels on the left side of the car should be rotated, if the car driving back, can also exchange the wiring of two motors, if the one side normal and the other side back up, as long as you can swap wiring of back side. Note: We don't supply any manuals please note about this befor you buy it. Package included: 1 x Electronic DIY Kit (batteries are not included)